PR: I was provided the mustard vegan wool coating fabric by The Sewist Fabric Shop to make this coat for a paid guest blog post. I am under no obligation to write this post and will not receive any payment for writing it – it is an independent pattern review. You can read my guest blog post here, where I discuss working with the fabric.
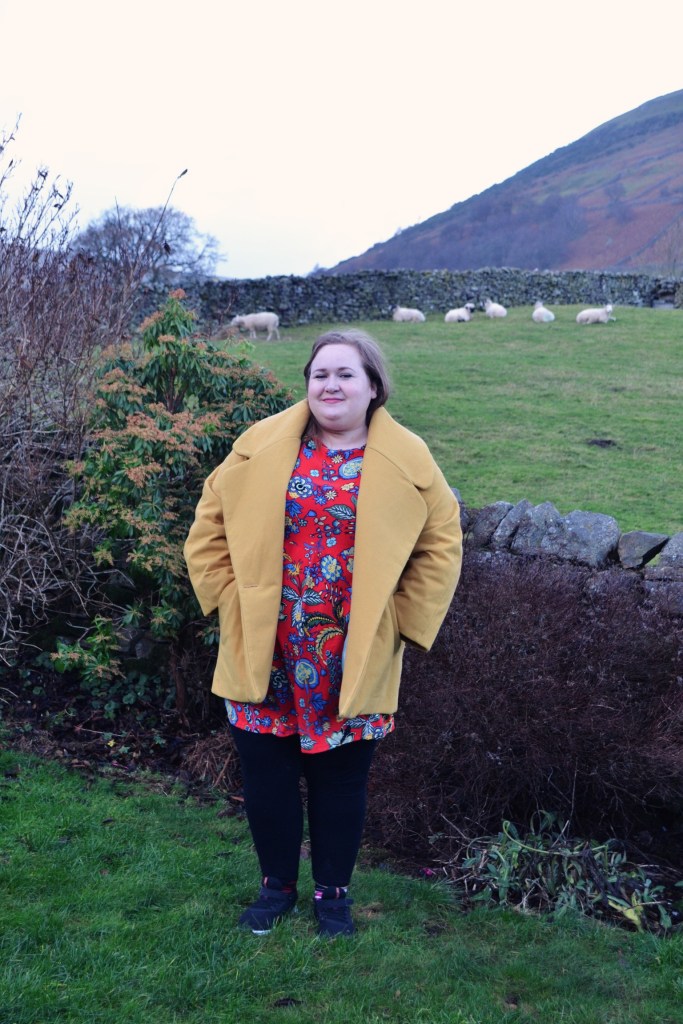
This project marked an escalation in difficulty for me; I’d sewn one coat before but it was a very simple pattern with a cocoon fit and dropped shoulders, so there wasn’t a lot of fitting to worry about and it was very forgiving of mistakes. This pattern has raglan sleeves, an oversized collar and lapels, welt pockets and is fully lined. It’s a relatively involved project – it’s the longest and most complex project I’ve undertaken – but thanks to the oversized design with lots of positive ease, fitting isn’t really an issue.
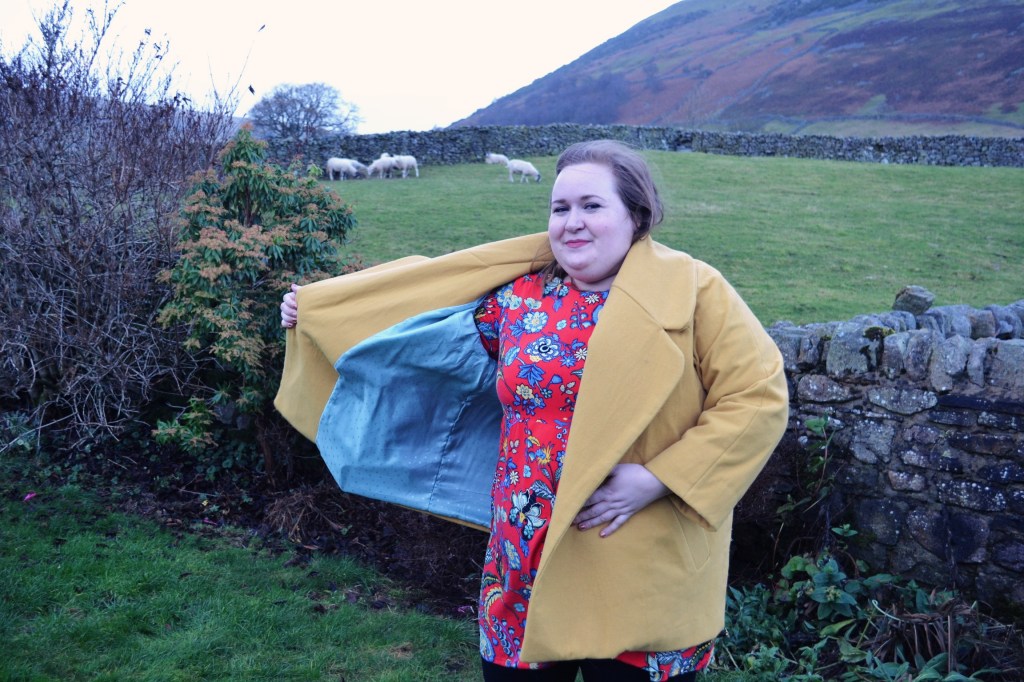
The pattern
I chose this pattern because I was looking to make something similar to the Max Mara cocoon coats: something in a solid colour, oversized collar and lapels and button closure. The size range is good – the size chart goes up to a 62.8” hip but the finished garment measurements go up to a 75.6” hip – so if you’re sized out based on body measurements, it may still be an option due to positive design ease. I actually chose to go down 3 sizes from the recommended sizing after looking at other people’s makes using the #TFSPoppyCoat hashtag and I’m happy with that fit. I chose to make the shorter version as I was concerned about where the longer length would sit on me as I’m 5’4” and it is a very oversized pattern!
I cut a straight size 20 to begin with and during the sewing process modified it to take the sleeves up by 1”. By doing it this way, my sleeve opening is slightly wider than intended, as the ideal way to make this modification would be to the pattern piece by shortening mid sleeve – however, I decided to make this mod at the point of attaching the sleeve lining to the cuffs and had to improvise.
The process
At the outset, one very good thing about this pattern is that there is a detailed sew along with photos. I made the Poppy using both the instructions and the sewalong, as there were points where I didn’t clearly understand what to do using just the instructions. At this stage, that could be because I was doing many things that were brand new to me rather than poor instructions, and if you use the two together then it’s very clear. You can’t just use the sewalong though as I found it did omit one or two steps that were in the instructions. Another feature of the sewalong that I found especially helpful was that it divided the sewing into pragmatic chunks with good stopping points – I found that I worked my way through it one part at a time, and had a break between each part. It really helped with a sense of progress and scale, and stopped me from feeling overwhelmed.
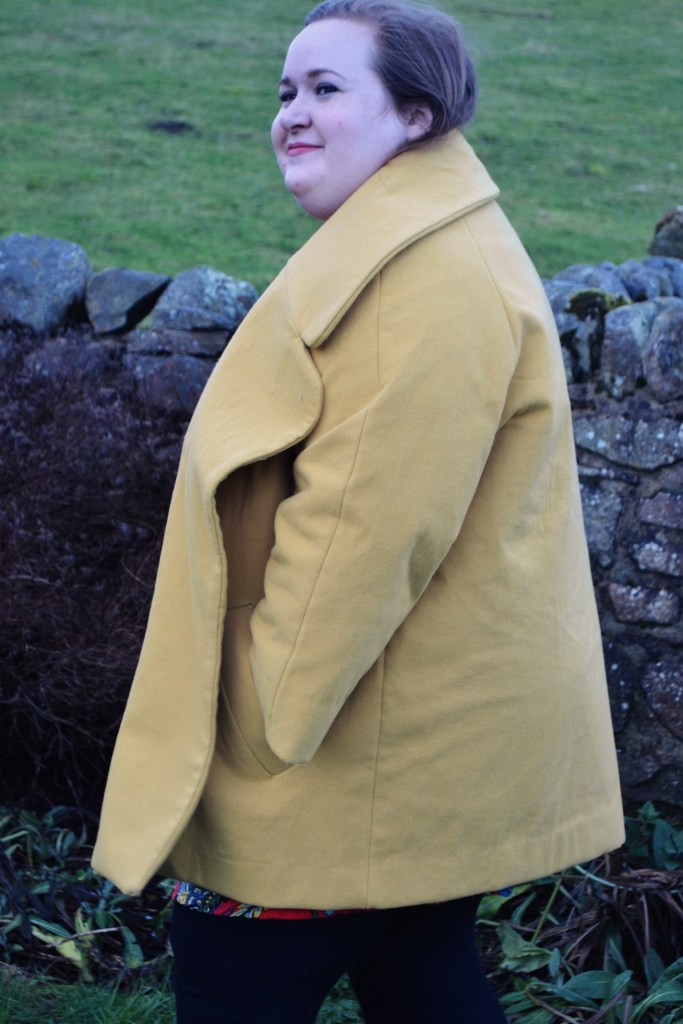
Generally, I found that I managed the new-to-me techniques quite well with the level of detail of the instructions. It was the first time I’d ever done welt pockets and I’m pretty happy with them in general (and over the moon with them as a first timer!). The collar was trickier – I followed all of the instructions and it came together very easily, but found it a little bit fiddly sewing the upper collar to the lapel right in the corner of the join; it took a few goes to get that right.
I did make one deviation from the pattern when it came to the collar – after finishing the construction of the collar and attaching the outer shell to the lining, I found that whenever I hung my coat up by the hanging loop, because the under collar wasn’t sewn internally to the upper collar, it opened up and bagged out. I consulted some friends about this and on their advice I added the step of sewing the seam allowances of the under collar and top collar together, which resolved this issue. The pattern does suggest you sew the outer shell and facing together at the raglan shoulder seam at a later stage, stitching in the ditch, and I didn’t do this as sewing the seam allowances together meant my outer shell was very securely attached to my facings and wouldn’t move around.
Another deviation was that I chose to bag the coat out through a hole in the side seam of the lining rather than the sleeve. This was because I wasn’t confident that I could actually bag it out through the sleeve, especially with the structure of the coat due to the interfacing.
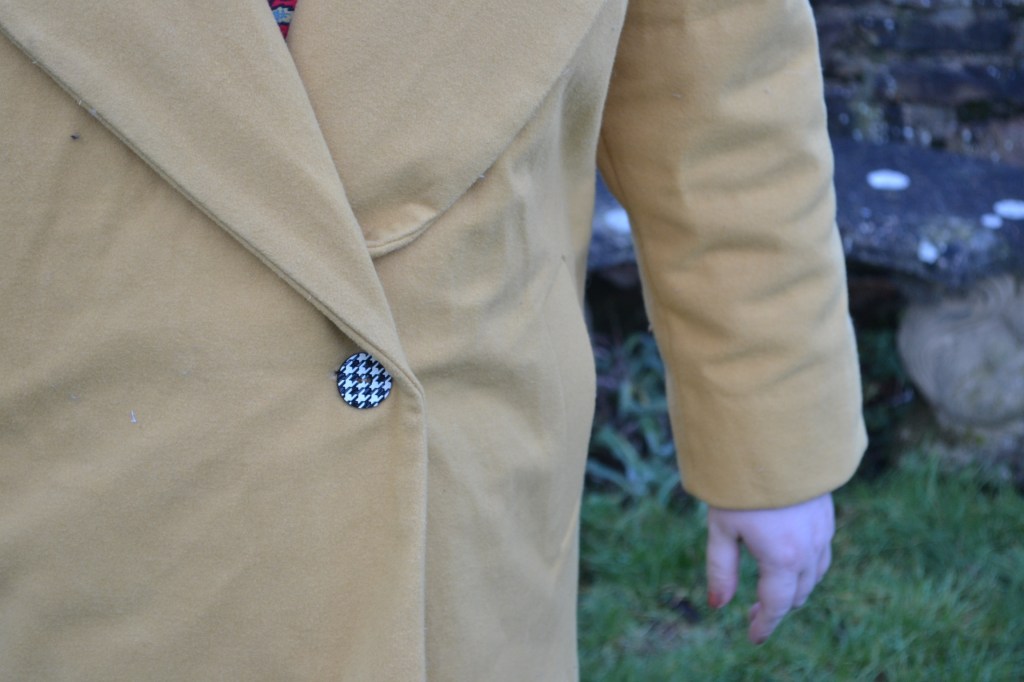
I also did a hand-sewn buttonhole for the first time as the width of the button recommended exceeded my machine’s buttonhole foot. I absolutely winged it without looking up how a buttonhole should be hand sewn, and then got a book on tailoring techniques for Christmas that taught me that there is actually a technique and specific thread should be used. Oops! But it feels like a good start for a first buttonhole and I’m more confident about sewing my own ones again in future.


Thoughts after wearing the finished garment
After wearing the coat several times, I do have some thoughts. In the shorter length the pocket bag hits the bottom of the inside of the coat. What this means is that if you have bulky items in the pockets (even a phone) then the bottom of the coat bulks out and you can’t keep the nice crisp fold at the bottom hem. This may also be because when I slip-stitched my facing, I wasn’t able to get all the way into the front corners of the coat, but I slip-stitched as far into them as was physically possible for me (and if you did manage to slip-stitch further it would mean the pocket bag wouldn’t be able to be fully extended). I think this is a drafting issue but it could be remedied by shortening the pocket bags, which are generously deep anyway.
I also made my coat by interfacing every piece and using a medium weight fusible interfacing, following the normal maxim that the weight of interfacing should match the weight of the fabric to be interfaced. This isn’t something I’d do again. It’s made my coat very structured; in this instance, it’s a happy accident as the structure works quite well with the fabric and gives it quite a mod A-line look, but I wouldn’t want that for the longer length coat or for other fabrics, and it has made the collar and lapels quite stiff – I suspect with more breaking in they may eventually settle, but at the moment they don’t really want to stay flat. I’ve since discussed this with other sewists who have suggested weft interfacing and some research into tailoring techniques suggests sewing in hair canvas is the way to go, rather than fusible interfacing. I think it would have been helpful if the pattern specified a weight of interfacing (probably lightweight) as the weight will drastically affect whether it’s a soft, drapey coat, or a crisp, structured one, and that information is especially relevant for beginner sewists who won’t necessarily know about how interfacing will work in tailoring (like me!).
Things I would do differently
I do plan to make another version of this coat as I really enjoy the collar, the oversized fit and the welt pockets. It’s a fun project to put together. But there are a few things I will do differently. At a pattern level, I’ll shorten the sleeves the right way by 1” and I will also make a square shoulder adjustment as when the coat is done up the collar is raised above my neck, rather than sitting on the neck. This is a standard adjustment for me though, and not an issue with the pattern drafting.
I’ll also go with different interfacing, likely either weft interfacing or I might try hair canvas. I think whatever I choose, I’ll experiment with interfacing some swatches to get a better idea of how it will affect drape and structure.
Overall, I’d give this pattern an 8/10 – I love the style lines and the sewalong is very helpful, but it could be improved with more guidance about interfacing and the pocket bag depth issue bothers me (although that’s a very easy fix for next time or wouldn’t be an issue for a longer length version).

Great coat and your review is really helpful, thank you.
LikeLike